How To Install Bathroom Baseboard
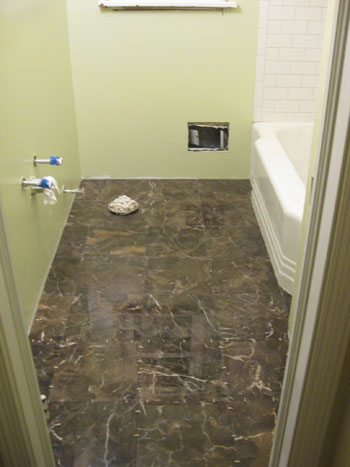
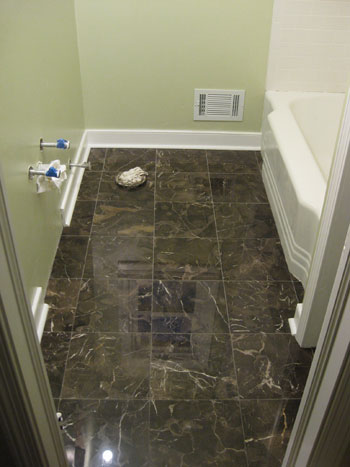
With all of our shower/tub and floor tile set, grouted and sealed, it really felt like the bathroom was finally coming back together. But the absence of one major finishing accent was still making the room look under construction: baseboards and trim. Take this pre-grouting shot of the floor for instance:
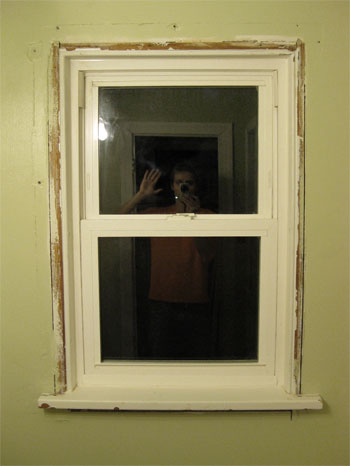
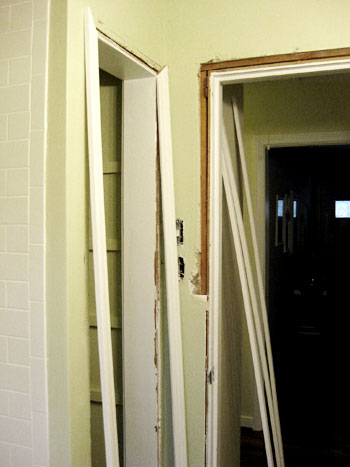
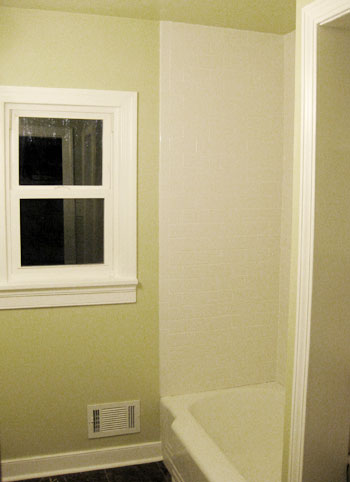
During demo, I started with the naive notion of salvaging the existing trim around the window and doors (both the main door and the linen closet). But I quickly realized that pipe dream was a lot more trouble than it was worth (many pieces were splintered, broken, or otherwise worse for wear). Not to mention that I couldn't avoid installing new baseboard around the floor anyway, since it had once been a tile border back when the walls were also tiled. So thanks to my handy crowbar and a hammer, out it all came… leaving things like the window looking like this:
So once the grout had set for 24 hours and had been sealed a couple of times, re-installing the trim became my #1 task. Having borrowed my dad's miter saw (have you noticed a theme here? thanks for all the tools dad!), I was mostly set in the "supplies" department. And, I'll admit, having another power saw to play with was basically all I looked forward to when it came to this task. Okay, that and the bit of math and measuring that I got to do too along with it (yes, I am a nerd thankyouverymuch).
Once I measured everything (lengths of each wall, each side of the doors and around the window) we headed off to Home Depot with samples of our old trim in hand. We wanted to get something similar so it matched the rest of the house, though we did opt for slightly wider versions of the same style, just for a bit more crisp presence. Home Depot, like most home improvement stores, sells trim in HUGE strips. Fortunately, they also offer a cutting station to hack the pieces down to transportable sizes. I actually spent a good 30 minutes at the station cutting every single section we needed, leaving a bit of extra on each one and even going as far as to label the backs of each piece with things like "44 inches, back wall under window" or "35 inches, spare." This came in handy when checking out because I could quickly add up how many feet I was buying without making the checkout girl suffer through measuring thirty-some sections of trim.
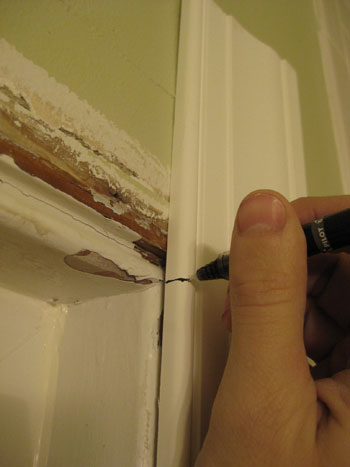
Rather than detailing my step-by-step process for all thirty-some sections that I installed, let's use the window as an example. First, I located the sections that I had roughly cut for each side and marked the inside edge of my cut with a regular old ballpoint pen. Honestly, the hardest part of this step was holding the camera and the pen at the same time.
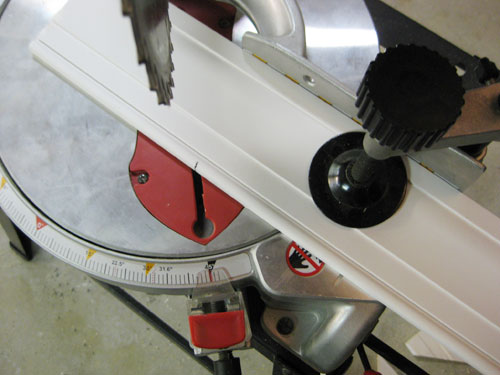
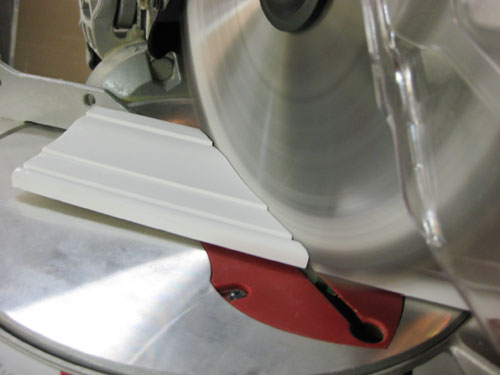
Then I marched through the house, out the sunroom, across the driveway and into the garage where I had the miter saw set up. This is a path I would travel quite frequently as I cut (and re-cut) everything. The miter saw is designed to easily cut angled (or mitered) cuts, so things like molding and trim can meet perfectly around corners and edges. Being new to the miter saw, I found it really easy to use. You just swivel the saw base to match the angle you need (I was doing all 45-degree angled cuts, fortunately), lock it into place, and then line the piece of wood flush against the guides. Oh and even though my dad's saw was equipped with a laser guide, I always pulled the saw down in power-off mode to see for myself where the blade would contact the trim first- just to be sure before firing her up and making my cut.
Cutting each piece was a cinch. And like the wet saw, I found it easy to come back and finesse each cut if I saw things were a bit too long once I got back inside. I live by the motto "it's a lot easier to cut more off than to put more back on," meaning I'm sometimes very conservative on my first cut and end up trimming things fairly frequently. It might not be the most efficient method, but it's definitely easier (and cheaper) than running out to buy more trim if you mess up and cut too much off from the start.
When it came time to affix the perfectly cut piece into place, we opted to go low tech. Rather than spring for some sort of power nail gun for such a small job, we bought a small 10 oz hammer (so we weren't swinging our usual monster anywhere near our tile when it came to the baseboards) and a small "nail set" to recess each nail into the trim without bashing in the trim with the hammer. Again, it might not be the fastest technique but it got the job done with zero damage to the rest of the room (and kept us blissfully under budget). Basically we just used the hammer to drive some finishing nails most of the way into the trim (leaving about an 1/8th of an inch sticking out).
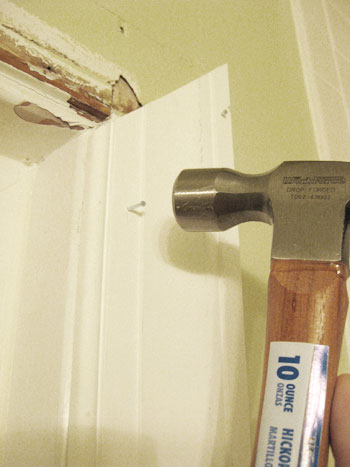
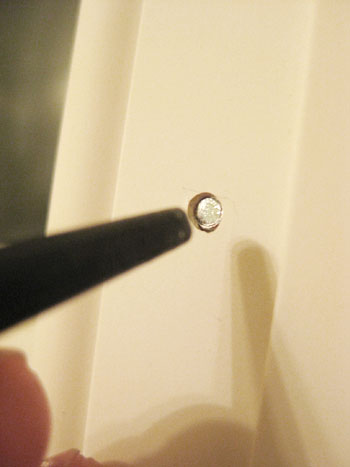
Then we came back with the nail set, a short metal piece that's (not by coincidence) the size of the nail head on one end. That way you can drive the nail all the way into the wood without damaging the trim around it with the wide and unwieldy head of the hammer.
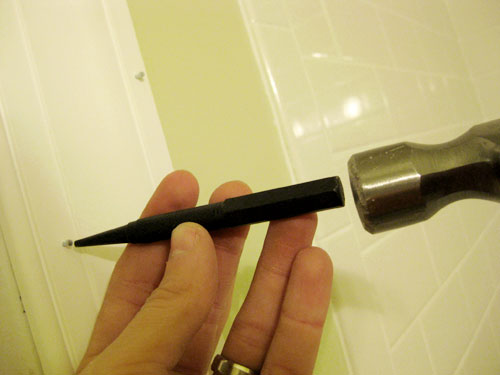
We actually drove the nail just slightly deeper than the surface of the wood so we could easily hide it with caulk later.
Oh and while the trim we bought is white, that's only because it's pre-primed, not painted. Some people choose to paint before installing their trim, but we've painted already-installed trim so many times that it's practically second nature to us (there's no whipping the paint out twice- once before installation and once afterwards for all the touch-ups- instead it's all one go at the end).
Anyway, once I got all of the pieces installed around the window, it looked 98% perfect. The trim was a little smudgy from all of the handling and, try as I might, the pieces weren't flawlessly flush in all spots but they were close enough. And that's where caulk and paint come in.
We chose to use white paintable door, window and trim caulk to fill our cracks and nail holes (we tend to like Dap as a brand, since we find it's among the easiest to work with). Here we are applying a generous strip at the corner seam of the window.
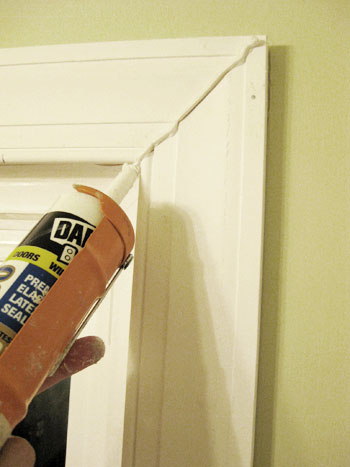
After squishing it into the seam with our finger and then wiping away any excess, it comes out looking pretty seamless.
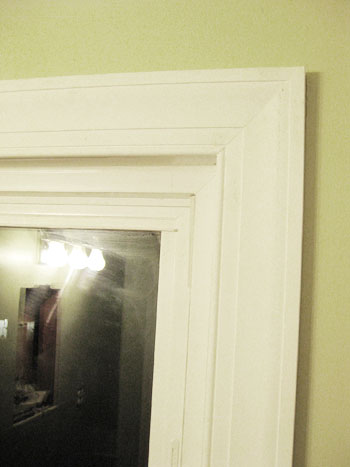
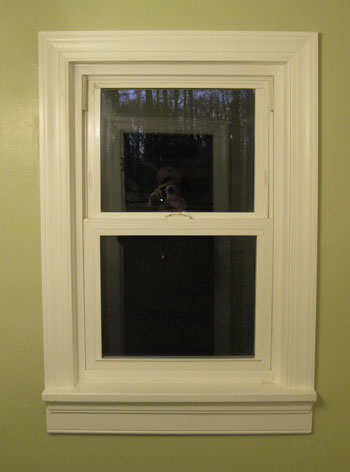
And once all of the caulk dried on the corners and nail holes, we put on a couple of coats of No-VOC Freshaire white semi-gloss paint and TA-DA!
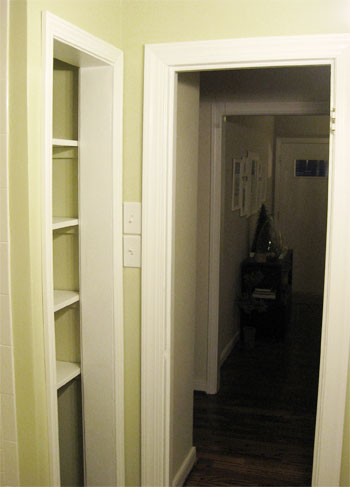
The trim around the linen closet and door were pretty much the same process, so here's a quick before (complete with trim pieces I was checking the lengths of)…
…and after: all caulked, painted and ready to rock.
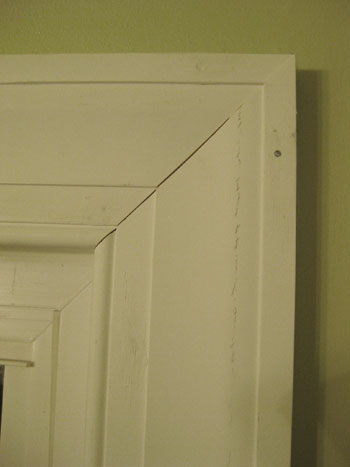
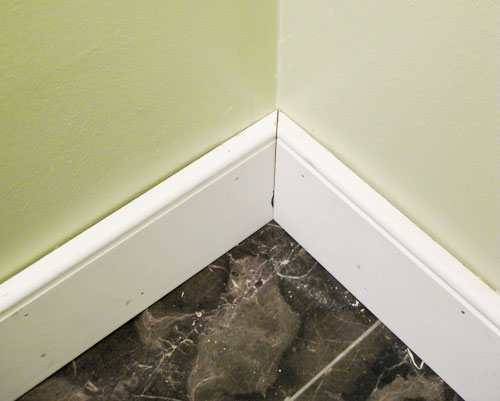
Now the floors were a slightly different task. Here I installed baseboard along the base of all the walls, including the interior of the linen closet, followed by quarter-round shoe molding to really finish everything off. I was excited by this part because it meant I got to cover up all the spots where my tiling wasn't exactly flush to the wall. Plus, I got to experience the miter saw's ability to make bevel cuts (these are still 45-degree angles, but they're made by tilting the saw blade to the side, rather than rotating the saw base). These bevel cuts allow pieces of baseboard to meet in the corners like this:
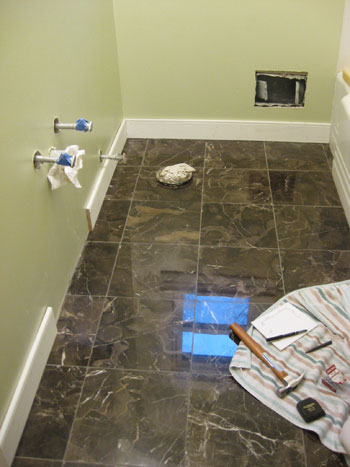
Meeting in the corners perfectly wasn't a big fear, since caulk would help me hide small flaws. My biggest fear was hammering so close to our precious floor. So as a safety measure I kept a towel under the hammer zone at all times for at least a little bit of a buffer and I used my smaller 10 oz hammer which was easier to control than our usual heavier and larger one. Here's a peek into what the project workzone looked like.
You're probably wondering why there's a big, missing piece of baseboard on the long wall. No, I didn't forget. That's where the vanity is going and, since we want it to sit flush against the wall, we didn't want baseboard in the way. So we placed the vanity in the room earlier to figure out where we wanted it (and where the plumbing forced it to go). Then we just marked the walls and measured and installed the baseboard accordingly.
After getting all of it in, we measured and cut the quarter-round the same way. The only difference was that we attached the quarter-round with Liquid Nails (ok, and a couple of real nails too) because despite wanting a flush fit everywhere, I was too chicken to manually hammer that close to the marble if I could avoid it. And we're happy to report that it worked like a charm.
A little bit of caulk and two coats of paint later… presto-change-o.
In the end it was about a five hour process. And just like grouting, the difference was amazing. More and more it was starting to look like a real bathroom. Imagine that. Next on the agenda was installing the toilet, building the vanity and then we'd practically be done (stay tuned for our DIY vanity play-by-play later this week). Can't you just taste the finish line? Us too, and it tastes a little bit like silicone caulk.
But enough about us, what are you up to this week? Any fellow bathroom re-doers? Anyone hanging trim or baseboards? Let's commiserate.
Psst- Wanna read about the first few chapters of the big bathroom makeover? Check out Chapter One, Chapter Two, Chapter Three, a little teaser post, Chapter Four and Chapter Five right here.
How To Install Bathroom Baseboard
Source: https://www.younghouselove.com/tackling-the-bathroom-chapter-six/


0 Komentar